•
|
• |
|
|
Lesson Objectives The procedures out lined here are for a powered horizontal landing and may not be applicable to certain types of space planes, and space craft. For the stock Delta Glider powered landings work quite well. The objects of this lesson are centered around using thrust to aid in a powered landing.
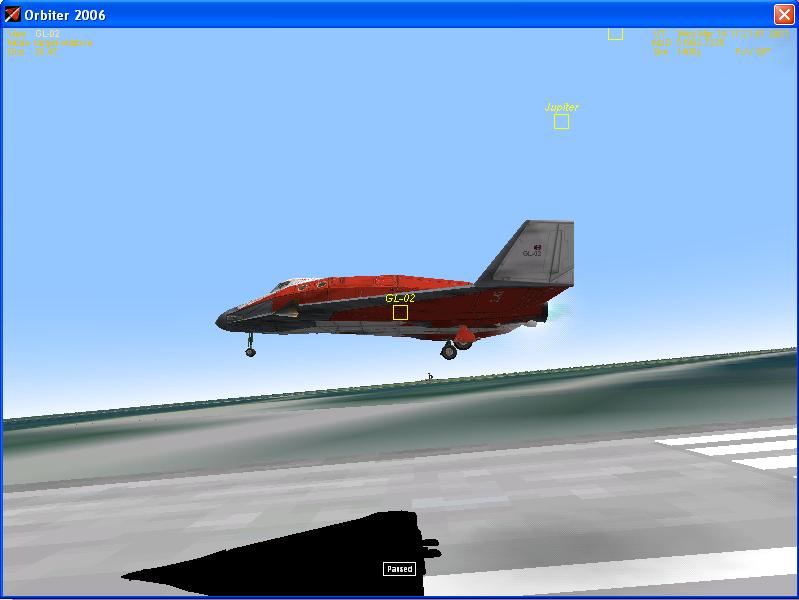
Section 1: Introduction The success full landing of an aircraft is probably the most challenging, as well as satisfying phase of a flight. Every landing is different due to varying wind conditions, runway surface and length, and possible obstructions at the approach end of the runway. The following discussion provides general procedures for a no-flap landing powered landing in a tricycle gear space craft. During the landing you use a combination of visual and kinesthetic cues. Practicing descents, slow flight, and power-off stalls helps to increase your sensitivity to control responses and allows you to develop smooth control application. However, your kinesthetic sense may not be fully developed at the time you begin landing practice and you must rely primarily on visual cues. The landing consists of three elements - the flare, the touchdown, and the roll-out. The term flare refers to the process of changing the attitude of the airplane from a glide or descent to a landing attitude. Its purpose is to reduce speed and decrease the rate of descent. The flare begins at different altitudes for airplanes at varying weights and approach speeds. However, for most training airplanes it begins at approximately 10 to 20 feet above the ground. Once the airplane is in a landing attitude the main wheels will touch the ground followed by the nose well. As you transition flying phase to roll out phase on the ground apply the breaks with even consistent pressure to bring the space craft to stop, Figure 1.
The performance standards for a successfully are:
Section 2: Use of Flaps In addition, airplanes can be configured for landing with no flaps, partial flaps, or full flaps if equipped. When you use full flaps for landing, you will typically extend the first increment of flaps on the downwind leg, the next on base leg, and full flaps on final approach. Since the full-flap stall speed is less than the no-flap or partial-flap stall speed, landing with full flaps results in a slower touchdown speed and shorter ground roll. Touching down at a slower speed allows for better directional control on ground. Section 3: Flare Begin the flare approximately 10 to 20 feet, or a wing span, above the runway by gradually increasing back pressure on the yoke to reduce speed and decrease the rate of descent. Focus at an intermediate point between the nose of the airplane and a distance down the runway. During the flare, you must look to one side of the airplane, since its nose may block your view ahead. The airplane should reach a near-zero rate of descent approximately 1 foot above the runway at about 8 to 10 m/s above a stall speed with the power at idle. Attempt to hold the airplane just off the runway by increasing back pressure. This causes the airplane to settle slowly to the runway in a slightly nose-high attitude as it approaches stall speed, Figure 3.1. Use a visual comparison of wing span to known objects on the ground, or depth perception, to determine the attitude for the flare and the height throughout the flare. The area where you focus your vision during the approach is important. For example, if you focus too close to the airplane, the airspeed blurs objects on the ground and your actions may be too abrupt. If you locus too far down the runway, you may be unable to accurately judge height above the ground and your reactions will be slow. In this situation, you may allow the airplane to fly onto the runway without flaring, Figure 3.2.
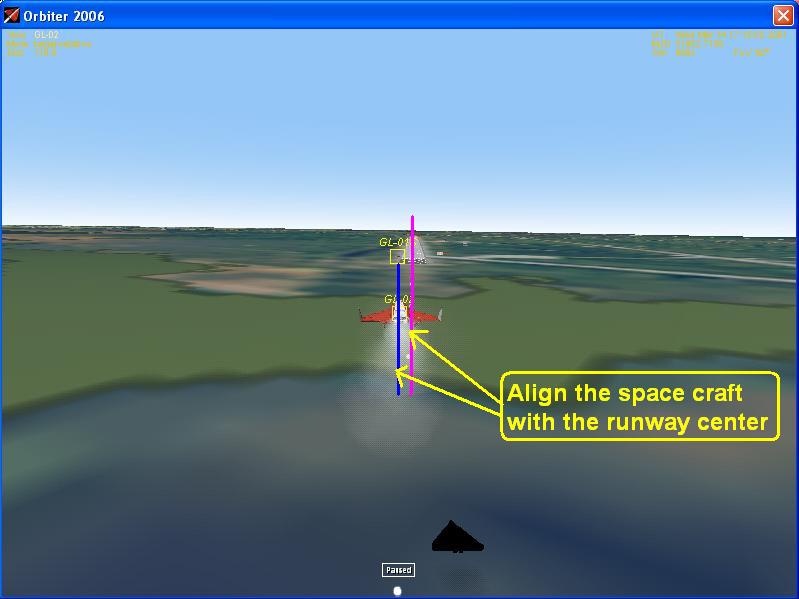
Section 4: Touchdown Touch down on the main landing gear in a nose-high attitude with the engine idling and the airplane at minimum controllable airspeed. As the airplane touches down, your heels should be on the floor so there is no tendency to use the brakes inadvertently. • Use the rudder to keep the airplane's longitudinal axis parallel to the direction the airplane is moving along the runway, use the runway center line to align the axis of the airplane parallel to it, Figure 4.1. • Hold back pressure on the yoke to maintain a positive angle of attack for aerodynamic braking and to hold the nose wheel off the ground. Let the main landing gear touch down first, Figure 4.2 • As the airplane decelerates, gradually relax back pressure to allow the nose wheel to gently settle onto the runway. Flying the airplane onto the runway with excess speed can cause floating or skipping and may result in a loss of directional control.
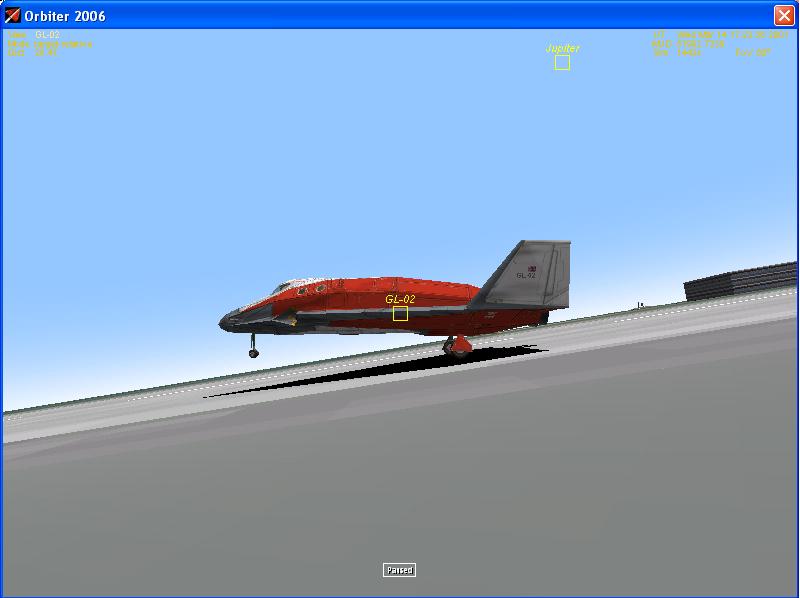
Section 5: Role out Maintain directional control with the rudder to keep the airplane on the centerline of the runway. Clear the runway and complete the after landing checklist. Taxi to the designated parking or refueling area, Figure 5.
Once the aircraft is at it's designated parking spot complete the engine shut down procedures. Section 6: Summary Check List - Normal Approach and Landing Listed below is a summary of the check list used in this lesson. A check list provides using abbreviated steps to help remind you of the action items that you need to take. They are listed here as a quick reference guide and are sited through out this lesson.
|
|
|
Send mail to
customerservice@fly-zero-g.com with
questions or comments about this web site.
|